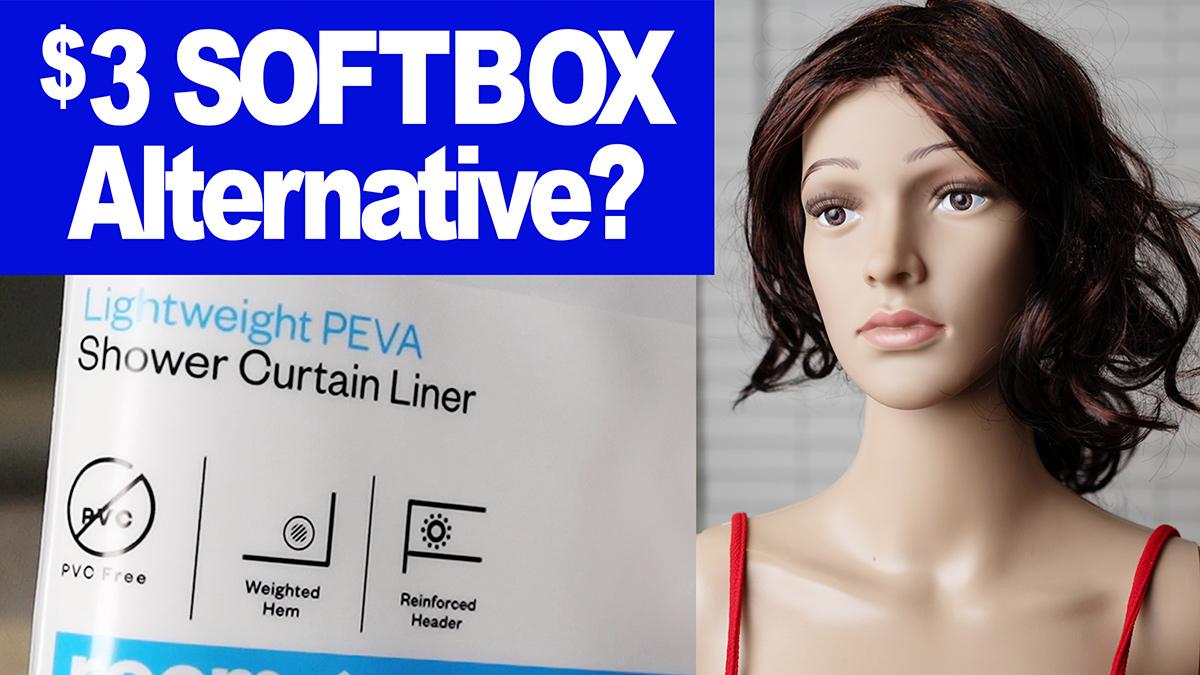
$3 Softbox Alternative?
Softboxes are the preferred lighting modifier for many portrait photographers. This is especially true if the goal is to achieve a flattering, softer-looking light. A softbox allows you to create a nice, even, and relatively larger light throw than you’d get with a basic flash or strobe alone.
By doing this, it reduces contrast and the appearance of harsh detail-defining shadows. Of course, you still have to use the correct placement and technique to really make this work. But this mostly comes down to keeping the light positioned slightly above the subject’s face and usually within 2-3 ft away, depending on the size of the softbox’s front panel.
See this article on setting up off-camera lighting.
Another good modifier offering similar advantages is the shoot-through umbrella (we call it a shoot-through because we aim the light “through” the translucent material of the umbrella toward our subject). This also effectively increases the surface area of the light against our subject so you can still get really pleasing softer light this way. Umbrellas are great because they are very light and portable, and budget-friendly.
There are a couple of downsides to using an umbrella vs. a softbox, though. For one, a standard shoot-through umbrella is curved, like an umbrella would be, which means the center area of the modifier is closer to your subject than the curved-out remaining area. This can result in a hotspot or at the very least, uneven lighting.
Also, most of these types of modifiers are open on the other side. While it can actually be beneficial to have extra light bouncing out of the other side of the umbrella, and around the room, if you need to prevent that from happening, a closed modifier like a softbox might be a better choice. So, use whatever works for a given situation.
I like both softboxes and umbrellas but I’ll also quickly note that one shouldn’t discount the basic wall bounce technique. This is something I love to use if a regular modifier isn’t feasible. Just point the flash at a large light-colored surface at an angle to your subject for a big, beautiful portrait light.
How Softboxes Work
Softboxes come in many different styles. There are square, rectangular and round-ish octoboxes. Some have internal baffles, diffusers, and different types of reflective materials making up the inner walls and the ability to install an external grid for more directional control. Some setup and break down like umbrellas, while others are really a hassle in that regard. All project the light toward the front translucent panel and out the other side toward the subject.
Does the softbox create “soft” light? Not really. At least, it’s not some kind of magically transformed softer light beams shining through the front panel of your softbox. What that softbox is actually doing is creating an even source of illumination equal to the size of the softbox’s front panel. If positioned close enough to your subject, her face will be illuminated from several points on the panel. This effectively makes some areas of the softbox its own fill light!
The same is true of any larger light source, or in situations where the light from your flash is allowed to bounce back toward the subject from different angles.
Do You Need a Softbox?
But for big, “soft” light, the softbox isn’t the only game in town. Photographers and cinematographers have used various types of light panels to shape light and control its intensity for as long as cameras have been around. These panels are sometimes referred to as scrims, diffusers, nets and reflectors. And depending on who you ask, these all serve distinct purposes.
But for my purposes, a scrim can be used as a tool for reducing, reflecting, or diffusing constant and flash lighting. We can use the scrim’s ability to diffuse light (and create a larger light source for our subjects) similarly to how we do it with a softbox. They both rely on a larger translucent front-facing fabric to create that soft-lighting look after all.
Making a Simple Scrim
Creating a scrim is as easy as securing a “silk” or translucent white fabric to some type of frame. You can use the type of white nylon translucent fabric made for lighting modifiers, if that’s your preference. If you’re shooting outdoors, I’d recommend a frame to keep the fabric in position. Indoors, you might not need the material permanently attached to a frame, in fact, you might be able to get away with just letting the fabric hang in place. If you think you can take advantage of something more sophisticated, you should consider a frame/panel kit or set. You can also buy translucent reflector/scrims as collapsable panels, which are very handy.
I ordered a 12’x5’ piece of material packaged under the Neewer label from Amazon. This reduces the light only about one stop and the manufacturer says it won’t become discolored with normal use. I was impressed with the quality and the fact that the piece was hemmed instead of just cut with ragged edges. I paid less than $20 for this piece.
As an alternative, you might try using a different type of material. I paid $3 for a shower curtain liner made of “Lightweight PEVA” which is a type of vinyl. It measures about 70” square. I lose about a stop in light and I don’t know if its color will change much with use. But it DOES diffuse the light and create a larger light source when used as a scrim.
How Does a Scrim Compare to a Softbox? How does the shower curtain liner match up against the professional diffusion fabric?
Watch the video for comparisons!
Which is Better?
There’s no single “right” way to light your subject; you’ll have to make those choices for yourself. The lighting effects and techniques you’ll use will be based on what exactly you’re trying to accomplish, and what you have available in terms of gear and materials.
A softbox makes it relatively easy to control the light’s effect and its position. But in a pinch, you can use a white translucent piece of material to help create a soft lighting look for your portrait. Photographers are problem-solvers, and this is just one more example of how you can use a low-cost alternative to higher-end gear to achieve good results.
[elementor-template id=”35633″]