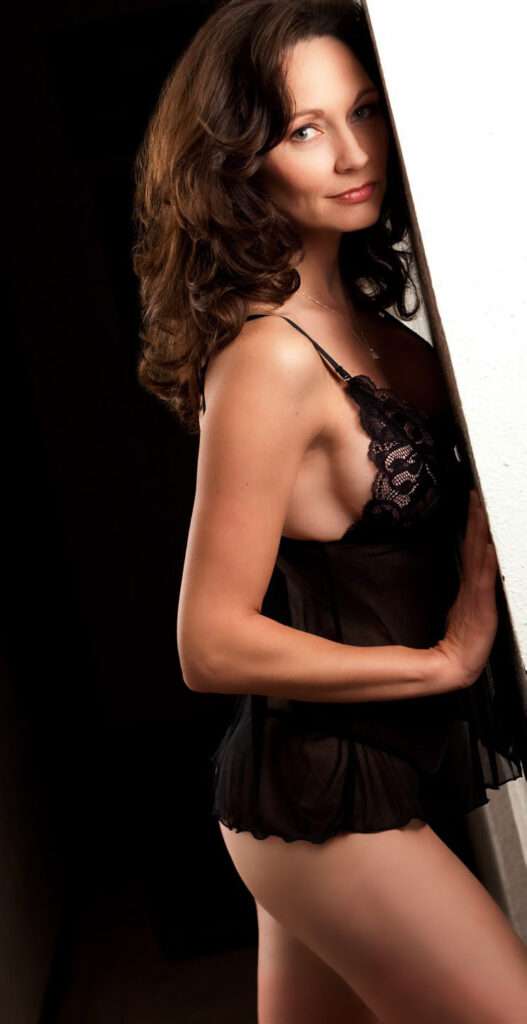
The Look
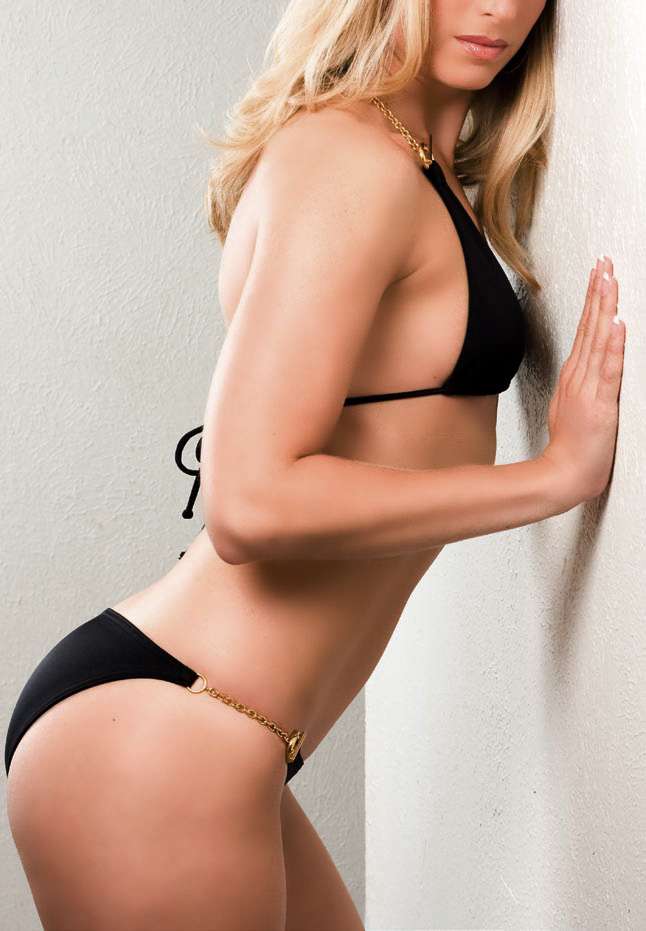
This pose creates a sense of tension and vulnerability, as the subject is positioned against a wall with seemingly nowhere else to go. Yet, it’s clear that she’s the one in control, making the first move. The look can range from coy and peek-a-boo to more forward and obvious, depending on the subject’s expression and posture.
The Setup
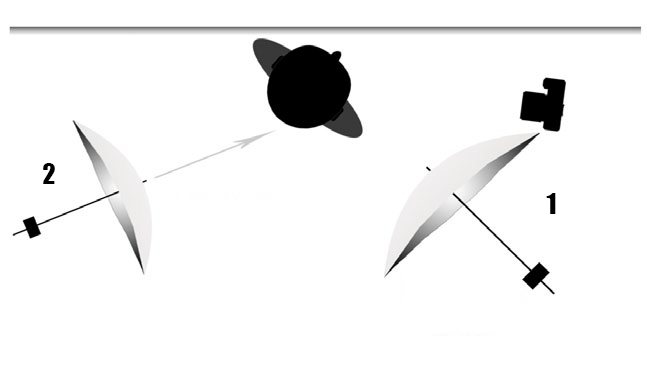
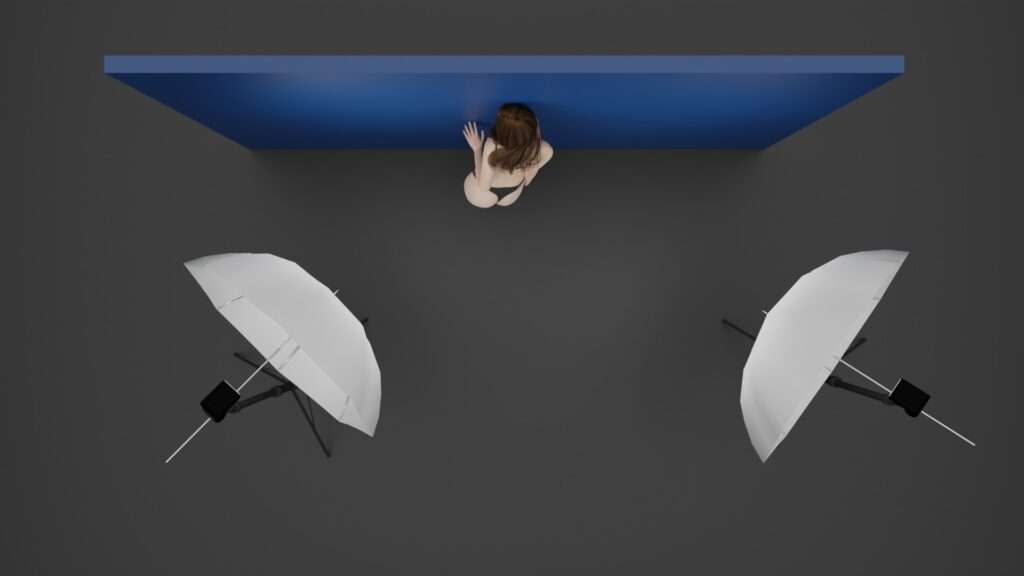
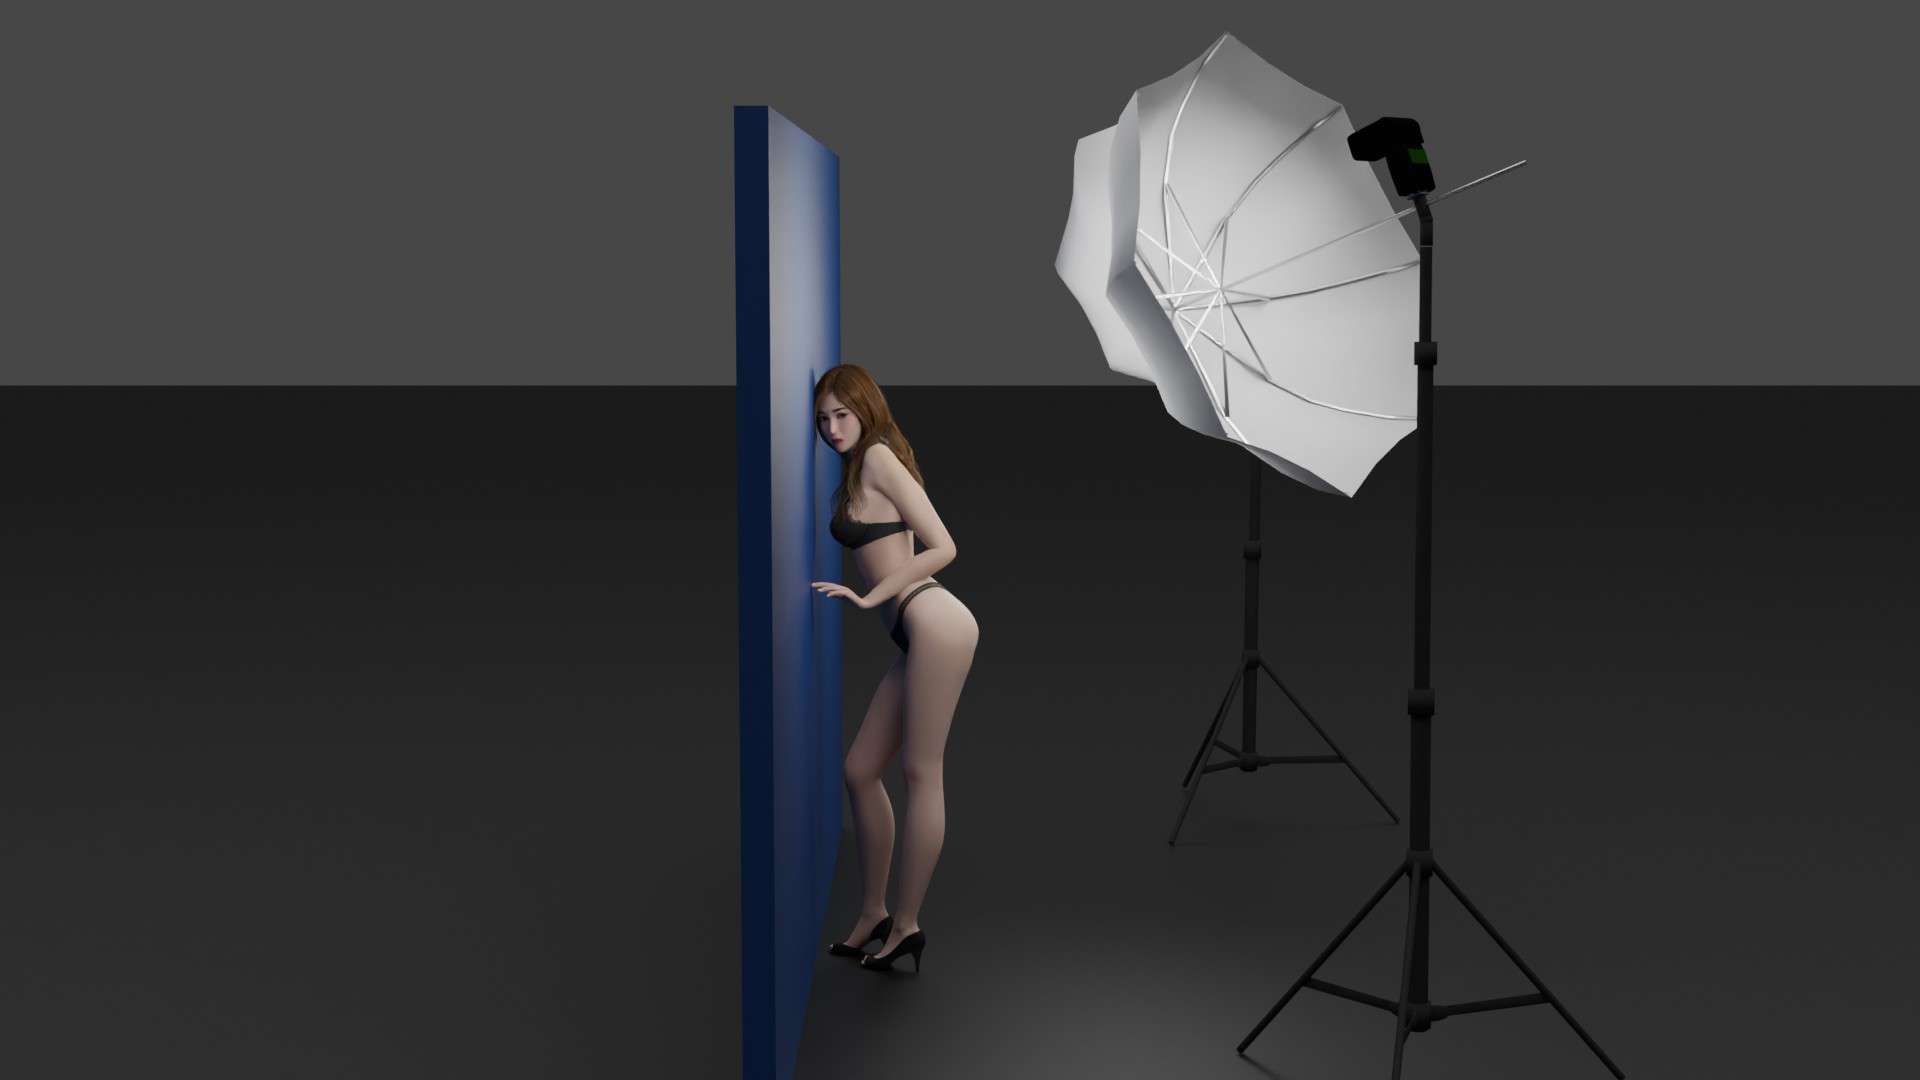
Choose a wall and a simple background. Two lights are recommended for this setup. The key light (light #1) should be positioned at a 45-degree angle in relation to the subject’s face (45/45). The rim light (light #2) should be placed far back, coming in at about 45 degrees from the wall, with the subject as the vertex.
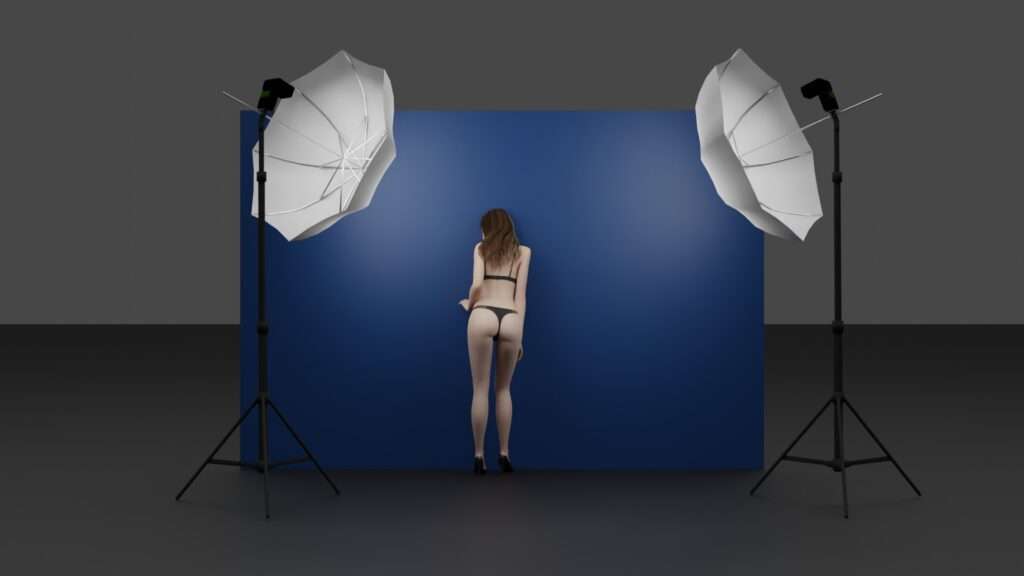
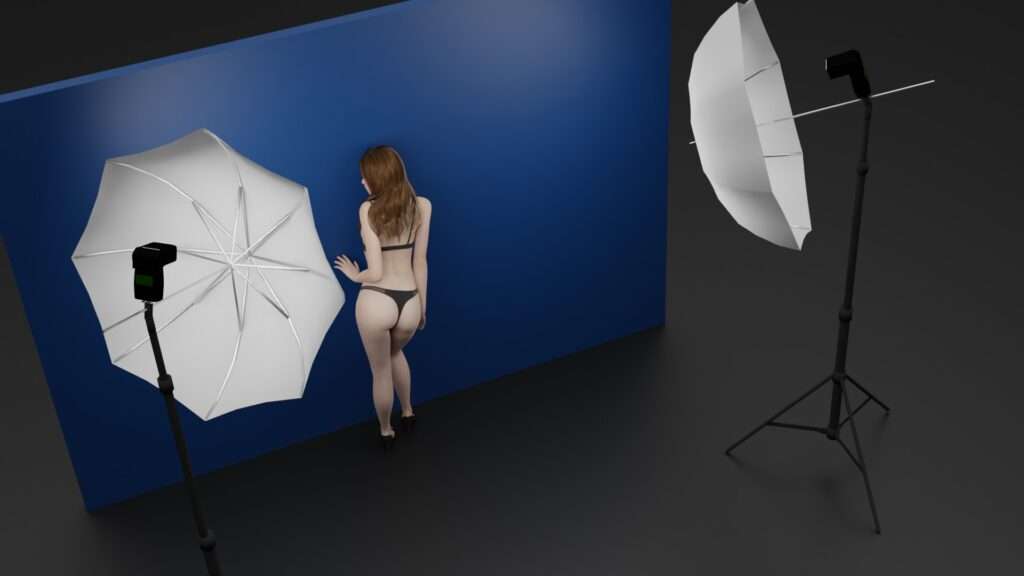
Posing
- Start by having the subject stand as if she is about to be “frisked,” with her front facing the wall.
- Instruct her to turn her face toward the camera.
- Direct her to position her chest so that it is just barely touching the wall.
- Ask her to bend one knee toward the wall while keeping the other leg straight.
- Have her arch her back slightly so that her bottom sticks out a bit.
My Gear & Settings
- Flash units at or near equal power, modified with 42” shoot-through umbrellas
- 50mm lens
- f/4.0 aperture
- 1/250 shutter speed
- ISO 100
Post-Processing
The images are usually processed with increased contrast to give them a more aggressive and direct look, completing a slick, magazine-style finish.
Tips for Success
- Hand Position: The hand nearest to the camera should be positioned either lower to help hide any tummy bulge or higher to block a protruding rib cage. Ensure that the hand and arm do not block the bust area. The other hand should be positioned in a way that it doesn’t appear awkwardly from behind her.