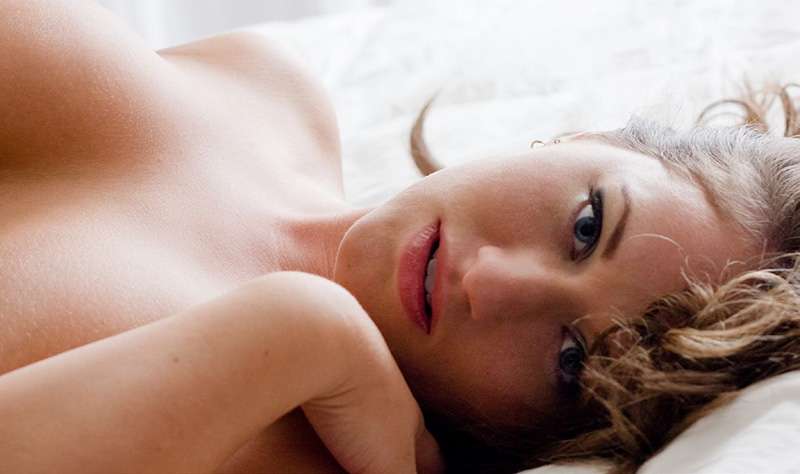
The Look
This setup captures your subject in a soft, peaceful, and fresh morning light, evoking iconic shots of celebrities like Marilyn Monroe. The look is white on white, with bright backlighting that mimics late morning sunlight streaming through a window. It’s perfect for creating an intimate, waking-up-next-to-you vibe. This setup works well with a wrap-around lighting effect, especially in sitting poses. Props like pillows, a comforter, and semi-sheer white curtains complete the scene.
The Setup
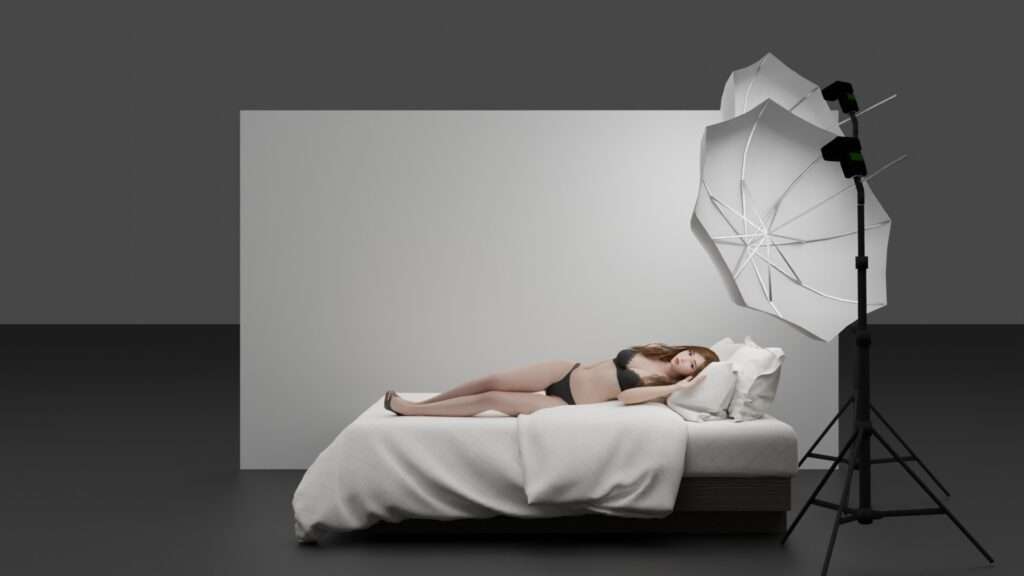
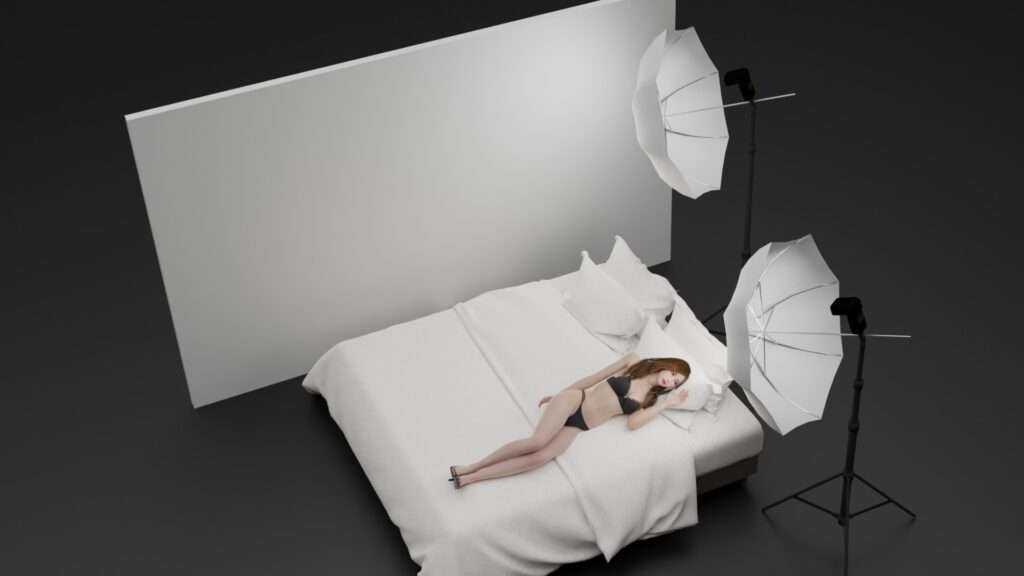
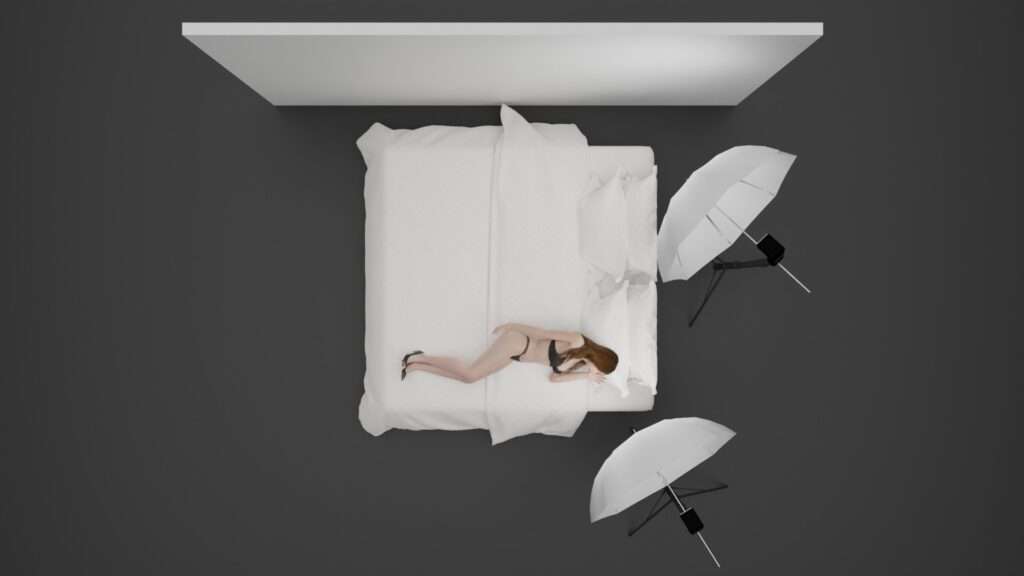
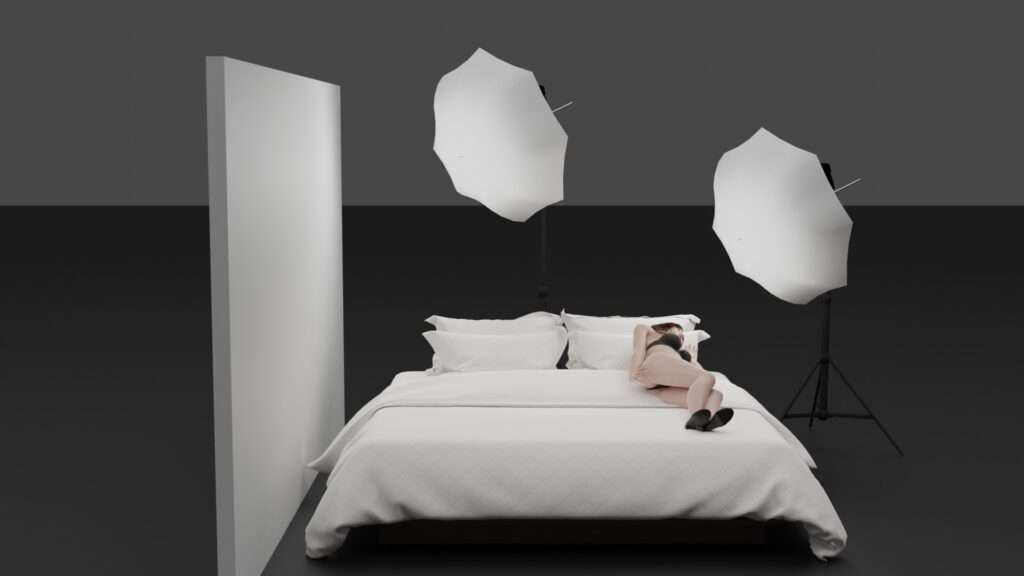
- Use a background stand with four semi-sheer curtain panels (almost like tulle fabric), or any white surface.
- Back the panels with a single white sheet of muslin to make the background slightly more opaque.
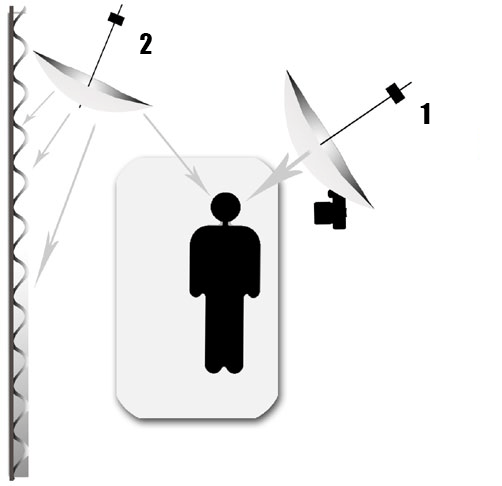
- Use a single light for the back light only as shown in the image above, or a standard two-light setup. The back light should be angled to illuminate both the white fabric backdrop and the subject from behind (light #2). The key light should come in from the front side, near the top of the subject’s head (light #1).
- Avoid lighting from the chin side to prevent unflattering shadows.
Posing
- Start with your subject lying on her back, looking up at the ceiling. Position her closer to the camera side of the bed.
- Have her slowly turn her face toward the camera, as if she’s about to whisper something.
- Incorporate hand movements, such as running her fingers through her hair or touching her lips.
- Ask her to close and open her eyes slowly while you capture a sequence of shots.
- Next, have her roll over to her side and then almost entirely onto her stomach. Happy and playful expressions work well here.
My Gear & Settings
- Flash units at equal power modified with 42-inch shoot-through umbrellas
- 50mm lens
- f/4.0 aperture
- 1/250 shutter speed
- ISO 100
Post-Processing
I often adjust the exposure, fill light, and warmth in Lightroom to enhance the overall look.

Tips for Success
- Light Positioning: Think of positioning the key (front) light as you would if your subject were sitting vertically. Aim for a 45/45 position in relation to her face.
- Room Bounce: If you’re in a small enough room, you can try using just one light coming in from behind. The room bounce and white bedding will provide some subtle fill light.